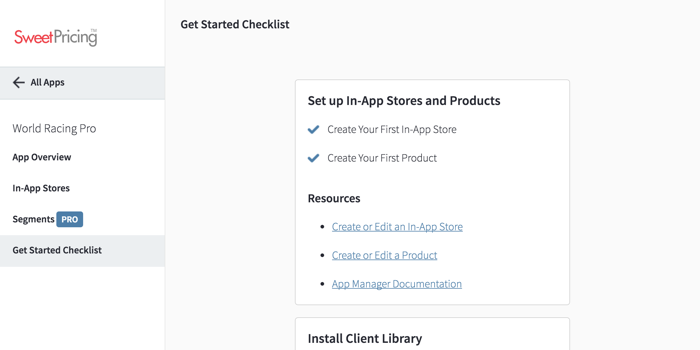
Get Started Checklist
The Get Started Checklist makes it simple to install Sweet Pricing in your existing Android or iOS app. Just follow our 3 step checklist from App Manager.
To use Sweet Pricing, you must set up your in-app products, install the Android or iOS client library and set up your pricing models. Our Get Started Checklist guides you through the onboarding process for every app that is added to your account.
To access the checklist, select your app from App Manager and click 'Get Started Checklist' in the sidebar.
The checklist is split into three sections and each section contains a number of tasks that you must complete. Once you complete a task, we automatically check it off on the checklist page. To use Sweet Pricing, you must complete every task in the checklist.
Each section contains links to useful resources, including these documentation pages. These links help you understand the tasks in more detail.
Although you can complete tasks in any order, we recommend you complete them in the order we have given. If you set up your static data first, you can easily test your implementation in the second step.
1. Set up In-App Purchases
The first task group asks you to set up your in-app stores and products. You must tell Sweet Pricing about the in-app products you currently sell. See Manage In-App Purchases for a guide to setting up your static data.
There are two tasks that you must complete. To complete the first task, you must add at least one in-app store to your app. And you must add at least one product to that in-app store to complete the second task.
2. Install Sweet Pricing Using Our Client Libraries
The second task asks you to install Sweet Pricing into your Android or iOS mobile app. The easiest way to use Sweet Pricing is with our client libraries. For a 4 step guide to using our client libraries, see:
Once you have installed the library, your mobile app will start sending data back to Sweet Pricing. At this point, the behavior of your app should be unchanged. Your app will be selling the same in-app products at the same prices, until you create a new pricing model (in the next task).
We automatically mark the installation task as complete once your app sends data back to our servers. If the task does not mark as complete within 5 minutes of sending data to Sweet Pricing, it means we could not process the event data.
Even if we mark this task as complete, you should test the tracking of both a view event and a purchase event. You can see this data from the Prices tab.
3. Create a New Pricing Model
Once you have set up your in-app purchases and you install the client library, you can, in theory, go live with your app. But, since the main features of Sweet Pricing are price testing and segmented pricing, we recommend you create your first experimental pricing model first.
See Manage In-App Prices for a guide to creating new pricing models.
As soon as you create your first pricing model, we will mark this task as complete. You should test that the prices show correctly in your implementation.
After You've Completed the Get Started Checklist
Once you've completed all tasks in the checklist, you should be ready to go live with your Sweet Pricing-enabled app. You will have set up your in-app products, installed our client library and created your pricing models.
But, completing the checklist is just the start. There's more you can do with Sweet Pricing. You'll find more guides in these documentation pages to help you set up user segments, understand enriched attributes and more.
